This blog post is for anyone interested to know how to configure a plugin using the Jenkins Configuration as a Code (JCasC) plugin, more specifically, this blog will guide you to get the YAML equivalent of a plugin’s configuration and use it to do some changes to the plugin without using the Jenkins UI.
If you’re a beginner at JCasC and want to learn more about it, you can head over to the following resources to understand JCasC better:
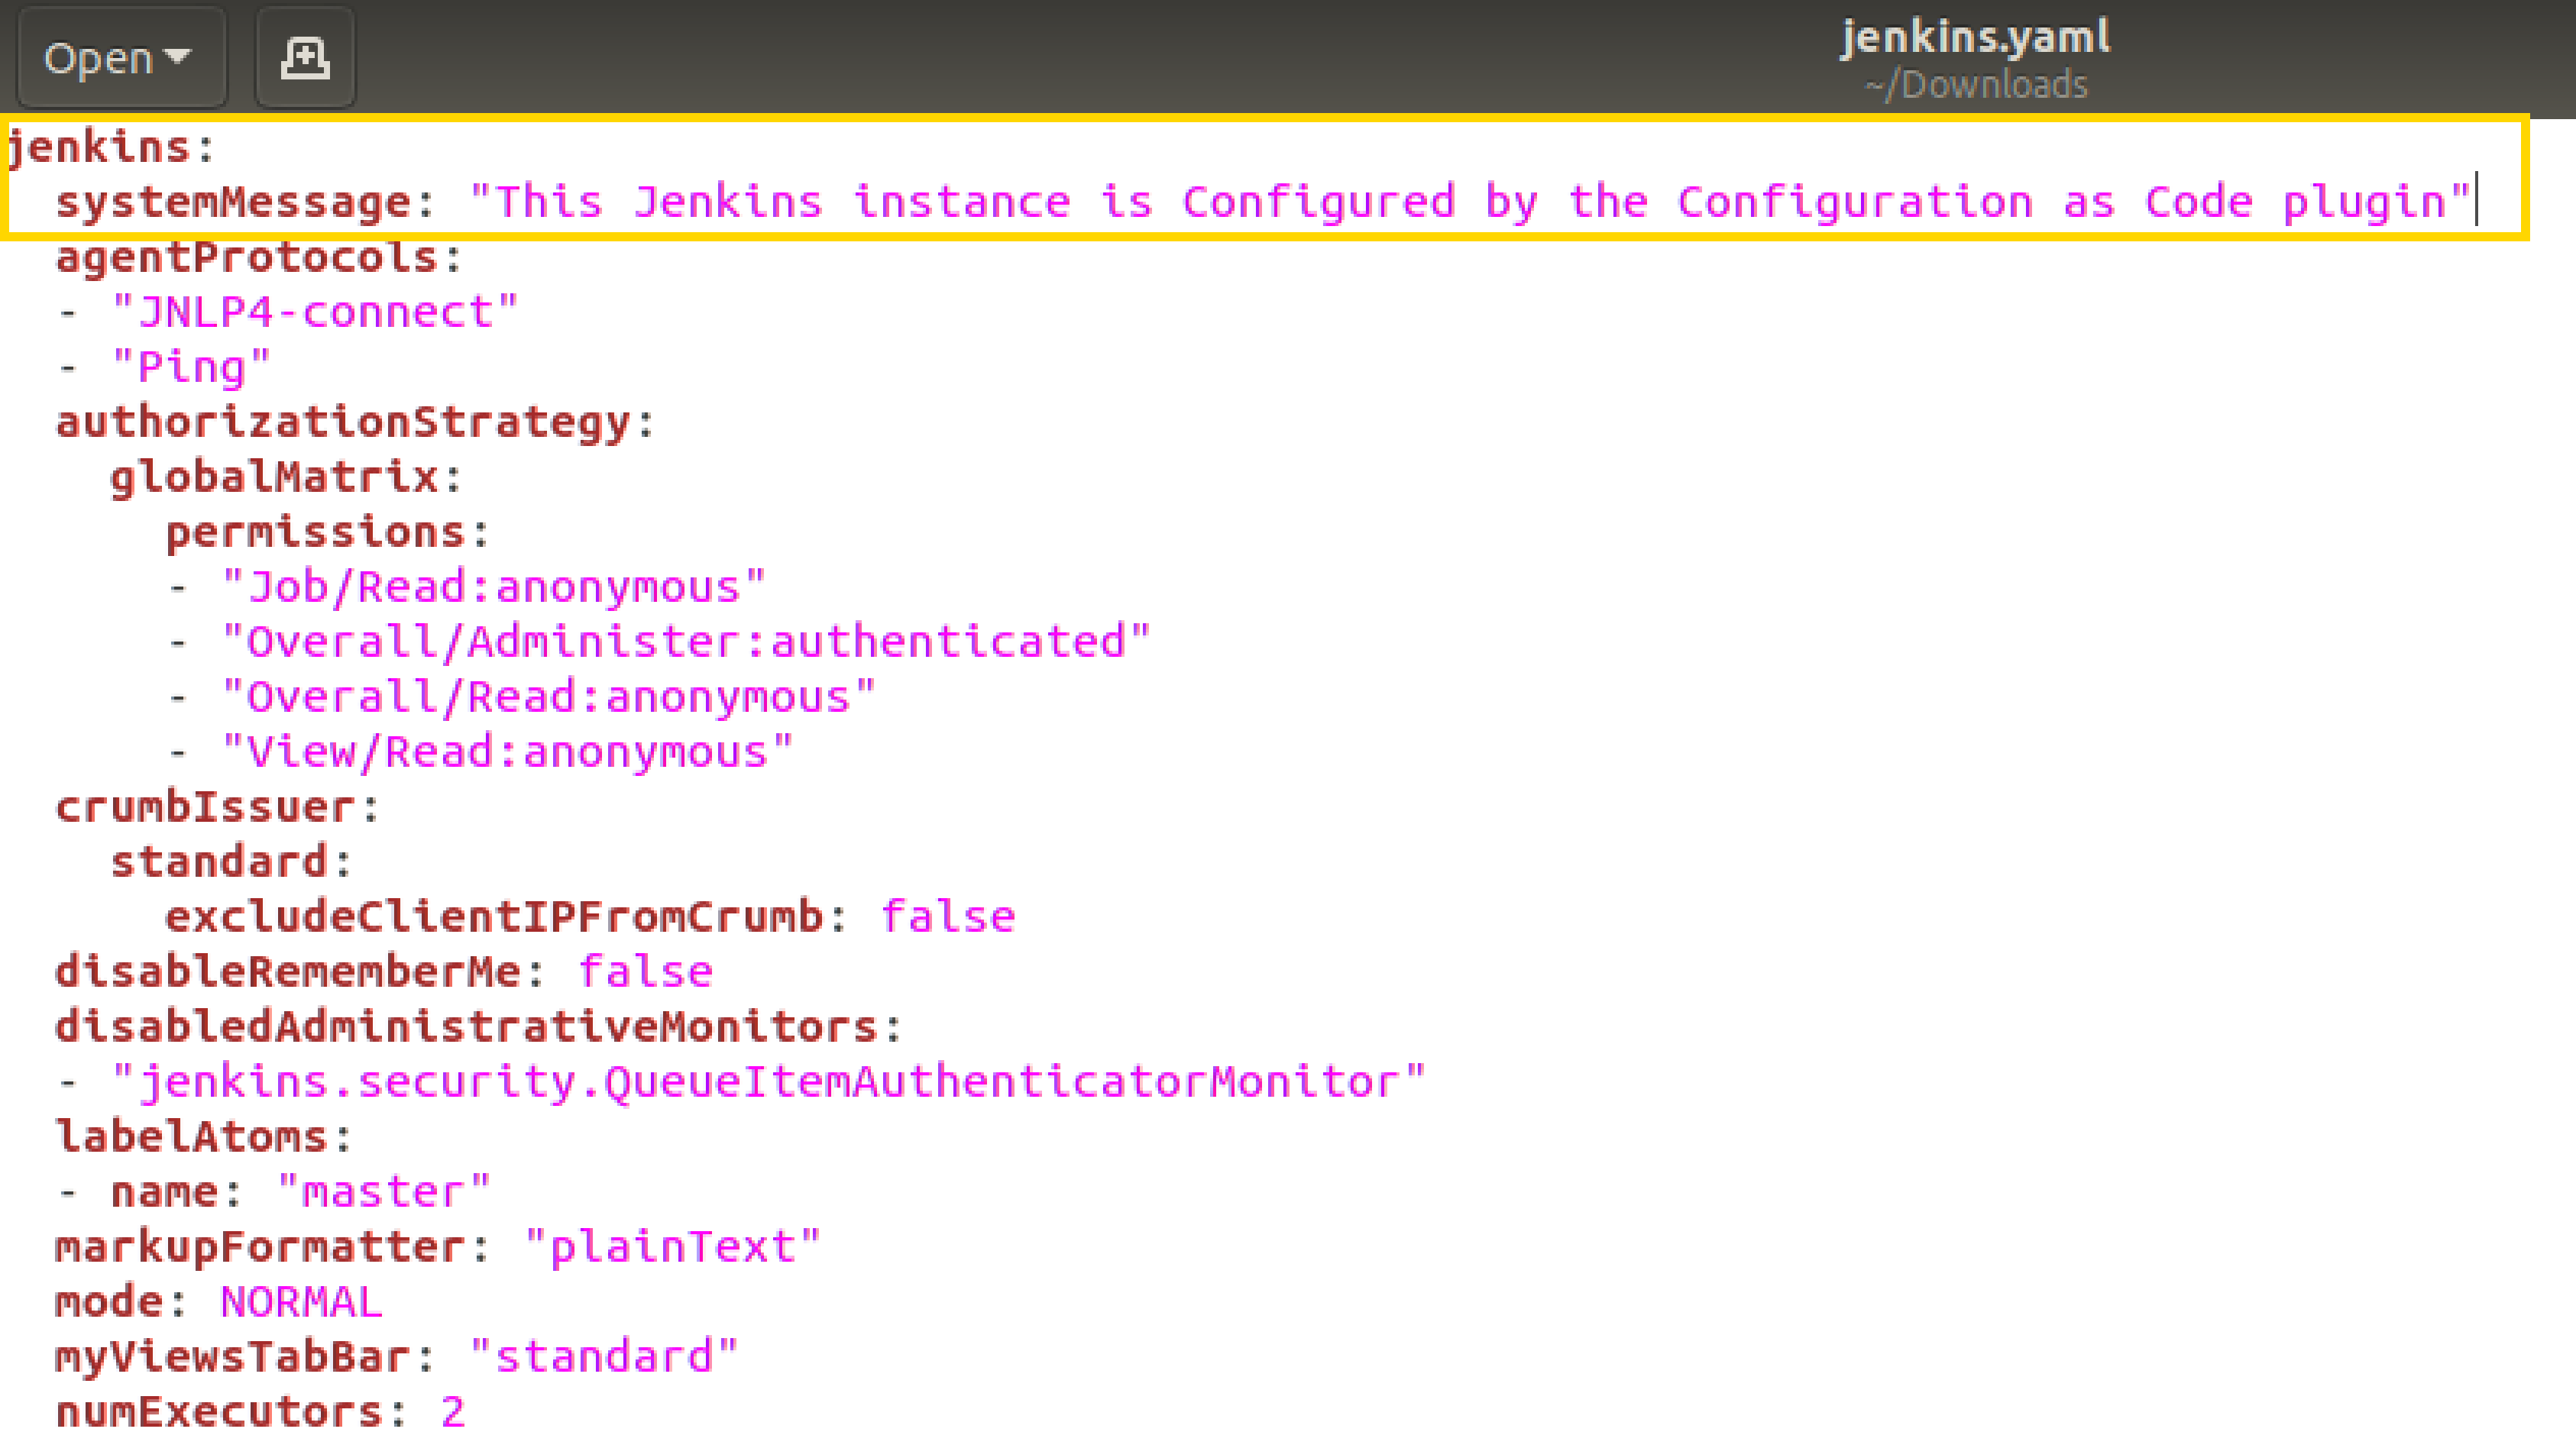
Brief Introduction to jenkins.yaml file
-
The
jenkins.yamlfile contains the configuration of the Jenkins instance in YAML format. The JCasC plugin refers to this file to configure the Jenkins instance. -
The default location of
jenkins.yamlis$JENKINS_HOME/jenkins.yaml, from where it can be fetched into the Jenkins server whenever you apply a new configuration. -
Download your
jenkins.yamlfile by going toManage Jenkins>Configuration as Code>Download Configuration. -
Make sure this file is saved at location
$JENKINS_HOME/jenkins.yaml. -
Let’s change the
systemMessagefield to:
-
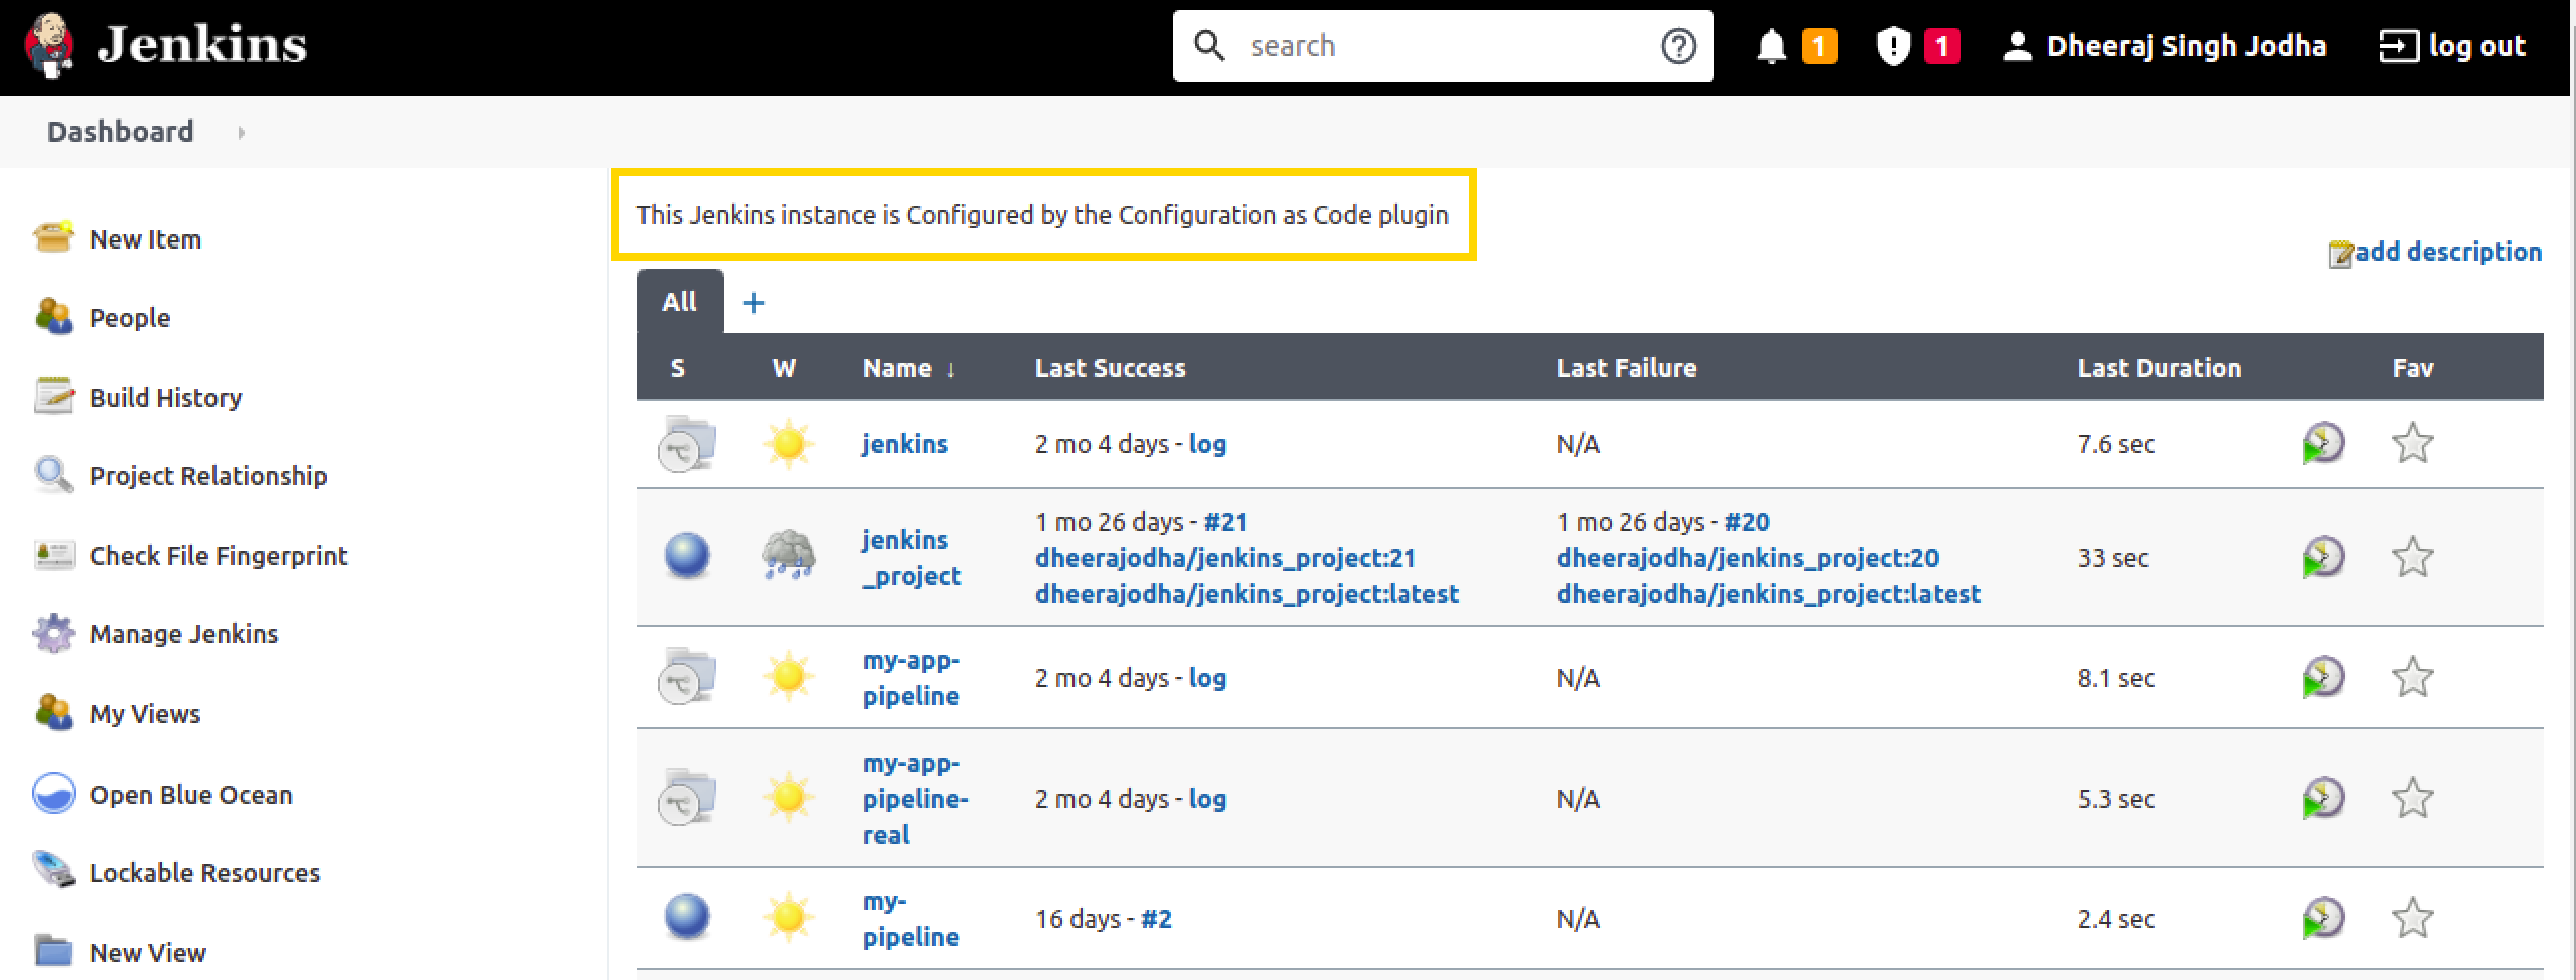
Reload the existing configuration to apply the system message change
-
Now, go back to the Dashboard and you can see the updated System Message on top:
-
This file will be used later to configure the plugin using JCasC.
Configure the plugin on the UI
-
For this demo, install the
View Job Filtersplugin. -
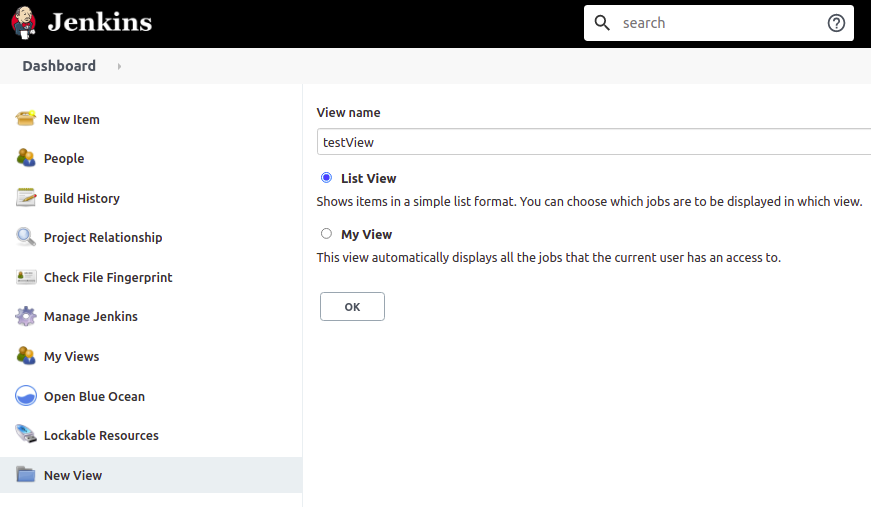
Let’s create a view by clicking on the
New Viewoption on the left side of the Dashboard. -
Give it a name (say, “testView”) and set its type to
List View, and click on theOKbutton.
-
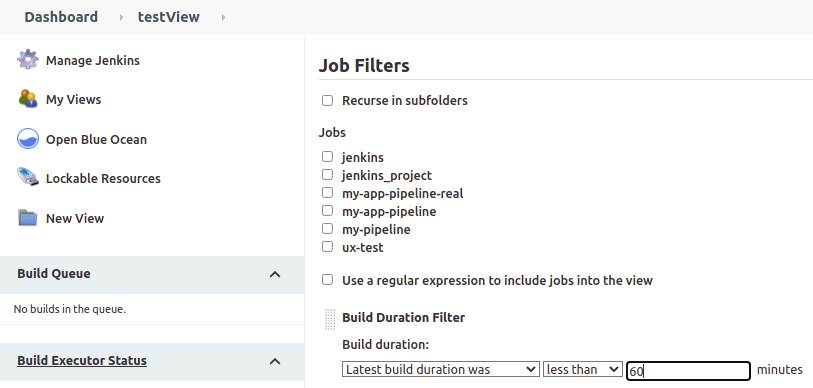
Now click on
Add Job Filterto add any kind of filter, so let’s selectBuild Duration Filterand fill the field with any value (say, "60" minutes),
-
Click on
Apply>Save. -
To view the full configuration, check out your main
jenkins.yamlconfiguration file, by clicking onManage Jenkins>Configuration as Code>View Configuration -
Go to the
viewssection in this YAML file to see details related to the view,

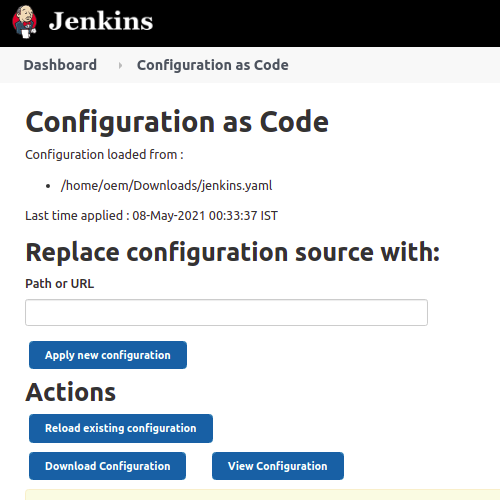
Download the Configuration
-
Now that you have successfully configured your plugin by UI, let’s download the configuration by going to
Manage Jenkinson the Dashboard, then click onConfiguration as Codeunder "System Configuration". -
Now click on the
Download Configurationbutton to save the configuration file locally.
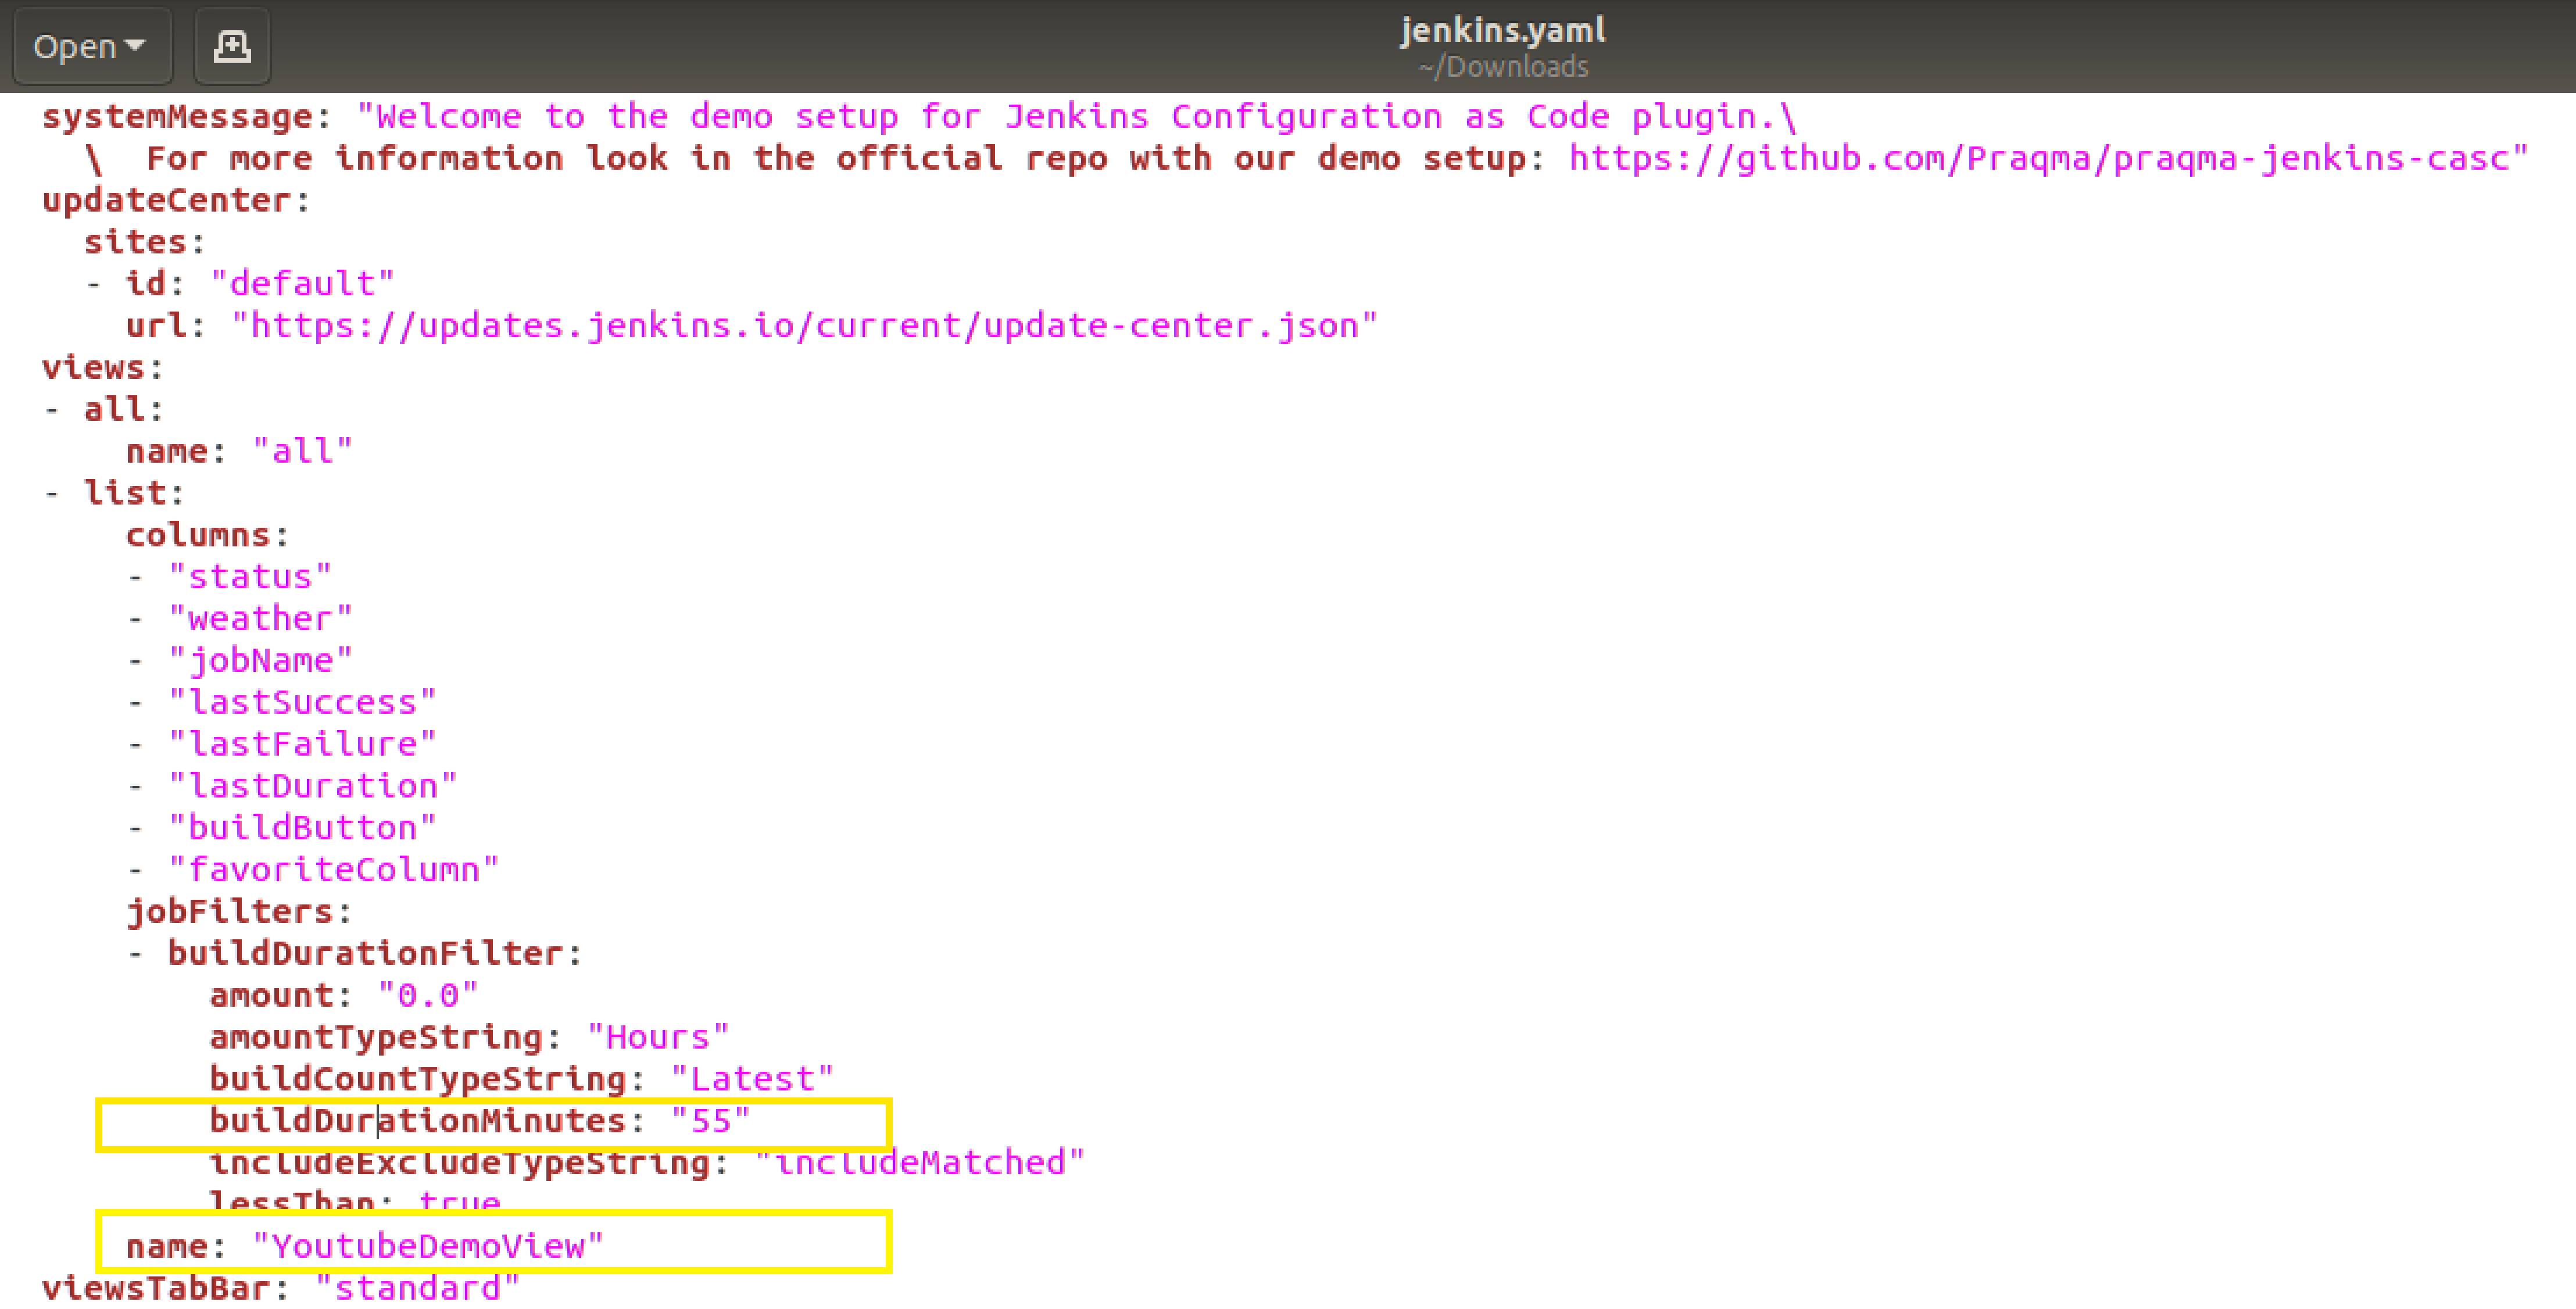
Update JCasC file locally
-
Add some changes in your downloaded copy of the
jenkins.yamlfile, to see those changes being automatically reflected on the UI. -
For demo purposes, let’s change the
nameto “YoutubeDemoView” and set thebuildDurationMinutesas "55".
-
Save the file.
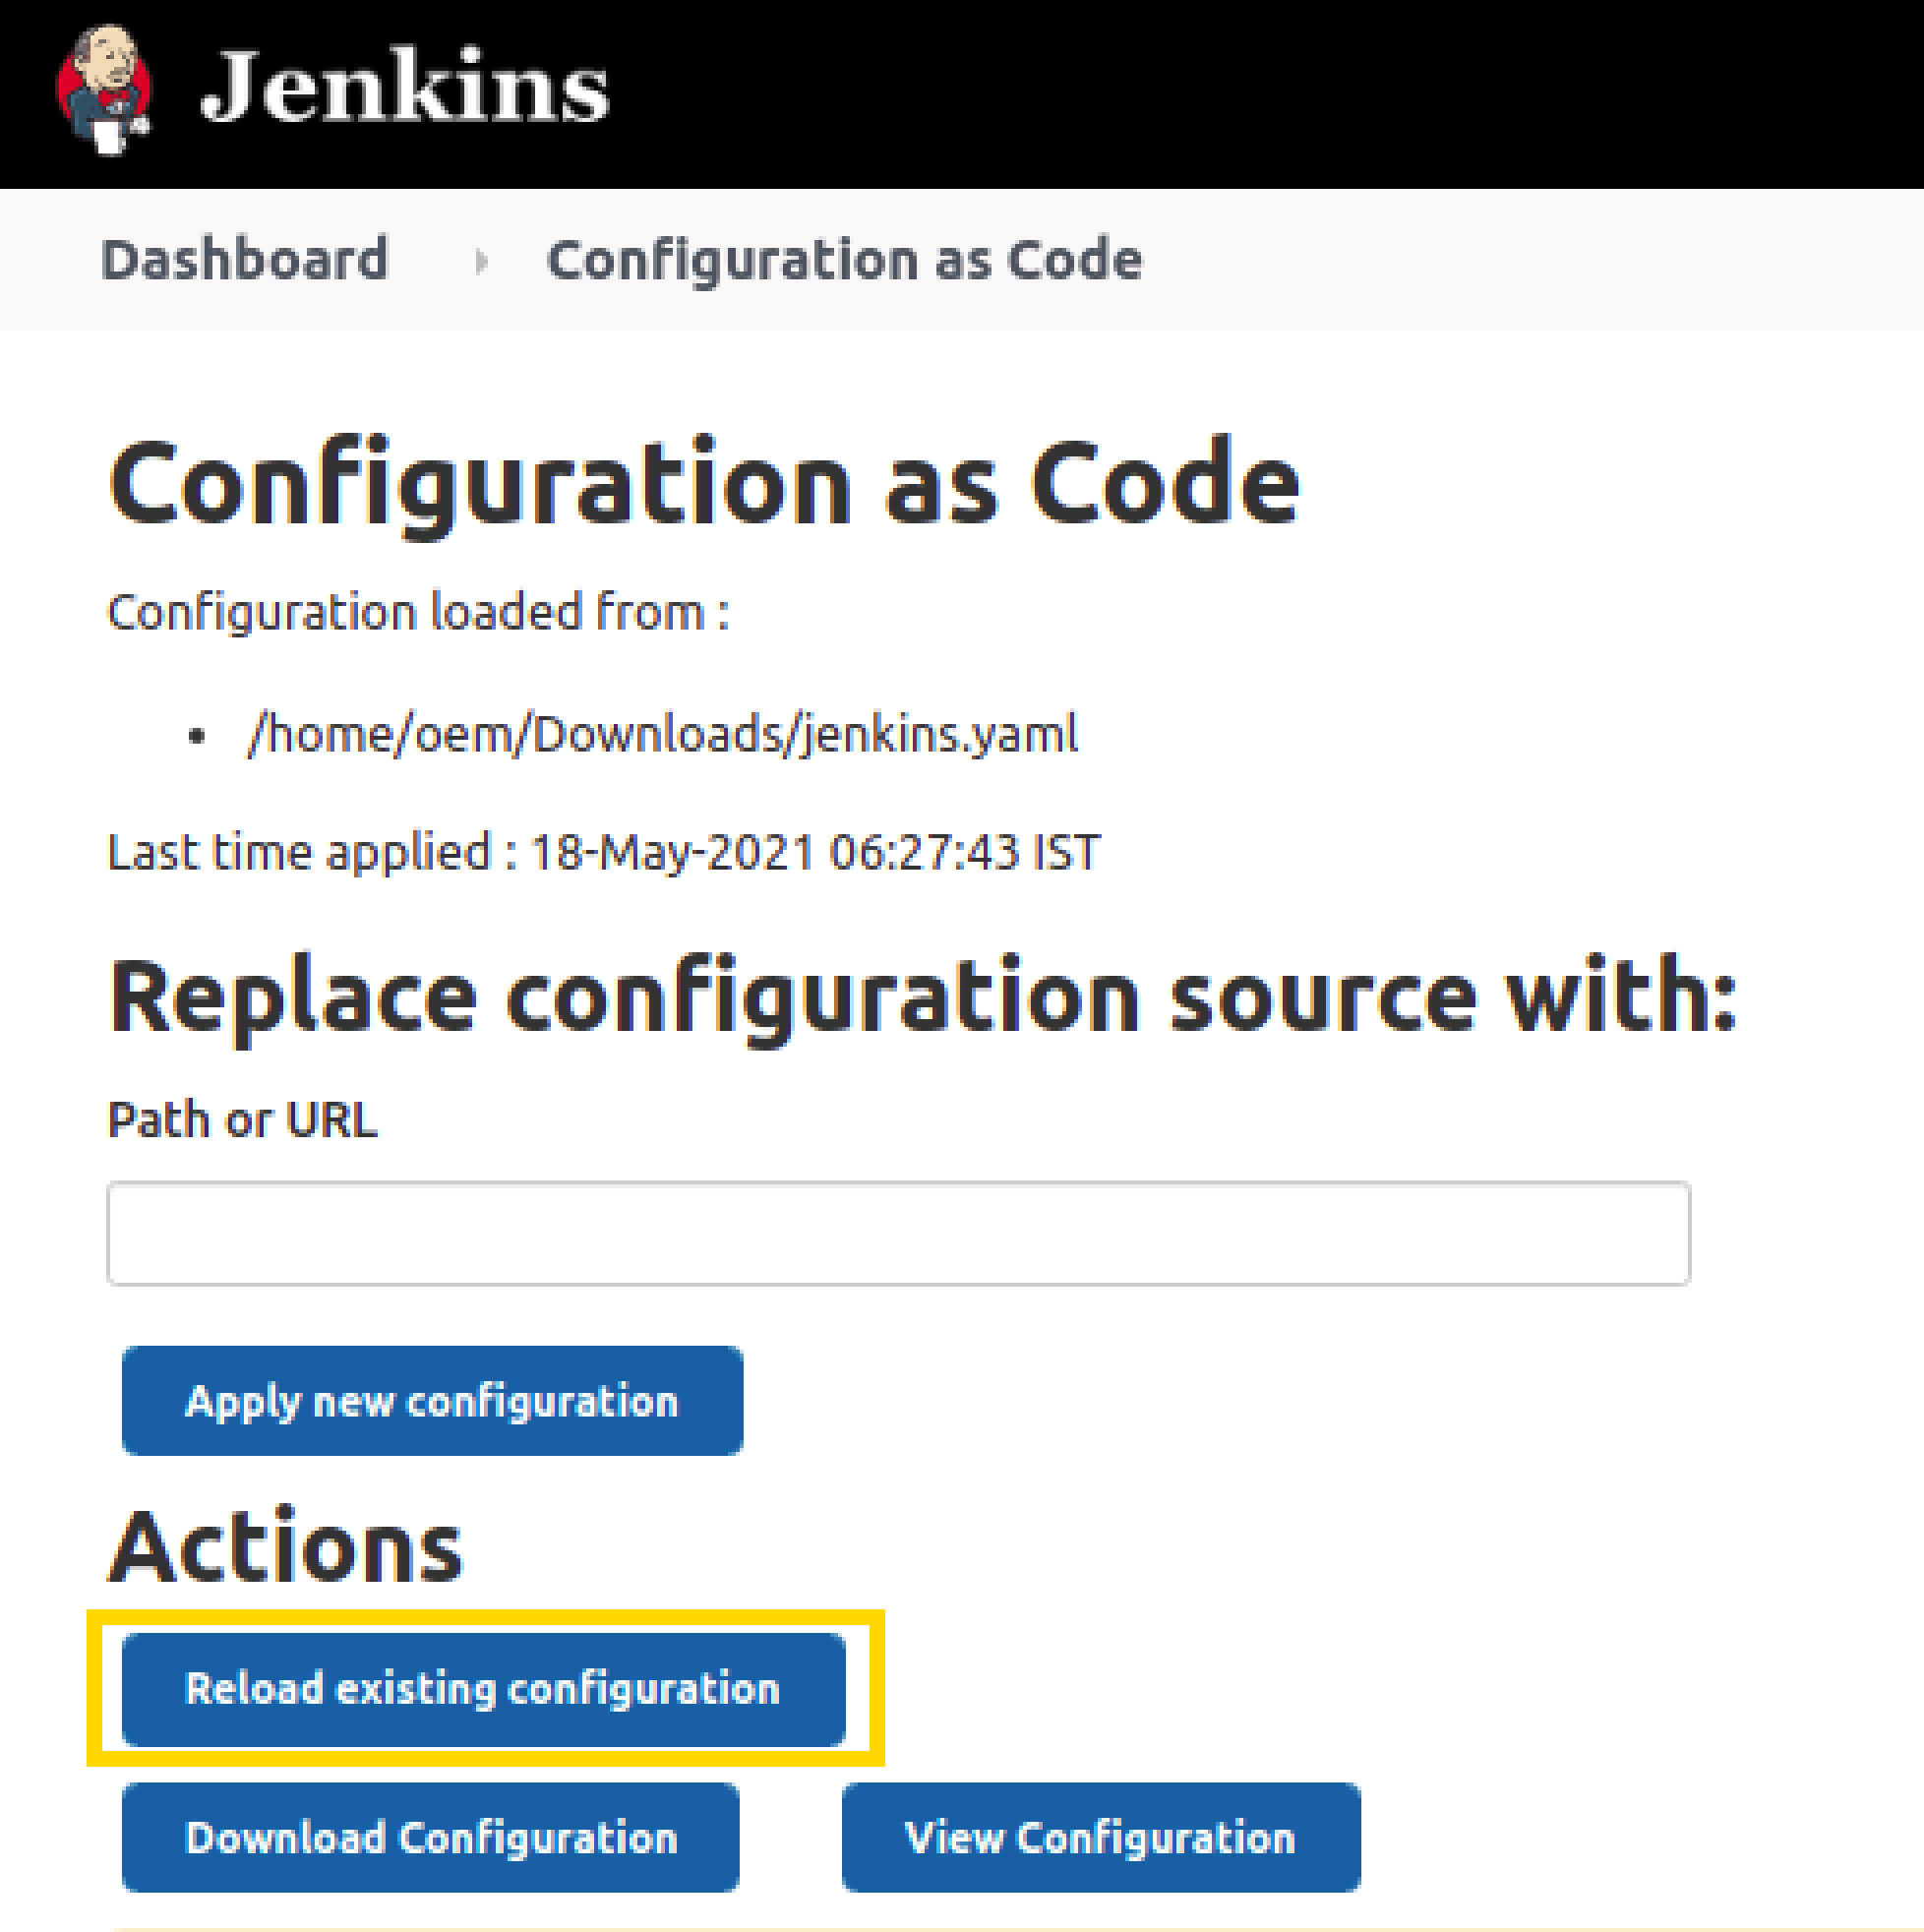
Load the jenkins.yaml file on the Jenkins server
-
Now to reflect the local changes done in the
jenkins.yamlfile onto the Jenkins server, click on theReload existing configurationbutton.
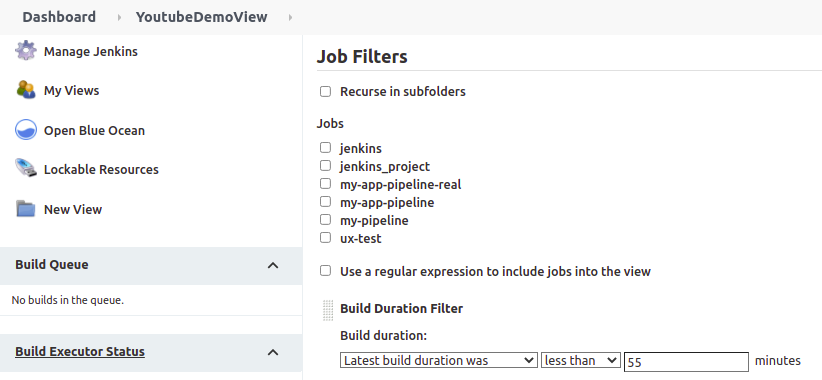
Verify the changes on the UI
-
Go back to the main page by clicking on the Jenkins logo on the top-left side.
-
And you will notice that the name of your view has been changed from "testView" to “YoutubeDemoView”,
-
And the field value of
Build Duration Filterhas been changed from "60" to “55”. -
These two are the exact changes that we did locally in our
jenkins.yamlfile.
Congratulations! You’ve successfully configured a plugin (“View Job Filter”) automatically with the help of the “Jenkins Configuration as Code” plugin! You can repeat the same process for other plugins as well.

|
Dheeraj Singh Jodha
Dheeraj is a Computer Science Engineering student (senior) at Vivekanand Institute of Technology, University of Mumbai. He started his journey of contributing to Jenkins in March 2021. His tiny contributions revolve around the Custom Distribution Service for Jenkins Project. He also likes to contribute to the JCasC project and documentation to help the developers. |